This tutorial was written using PSPX2, but any version should work.
Supplies Needed:
Vix Mask 97 Which you can download from Vixpsp~ HERE
Okuma sand scrap kit, which you can download from Cupcake sprinkles~ HERE
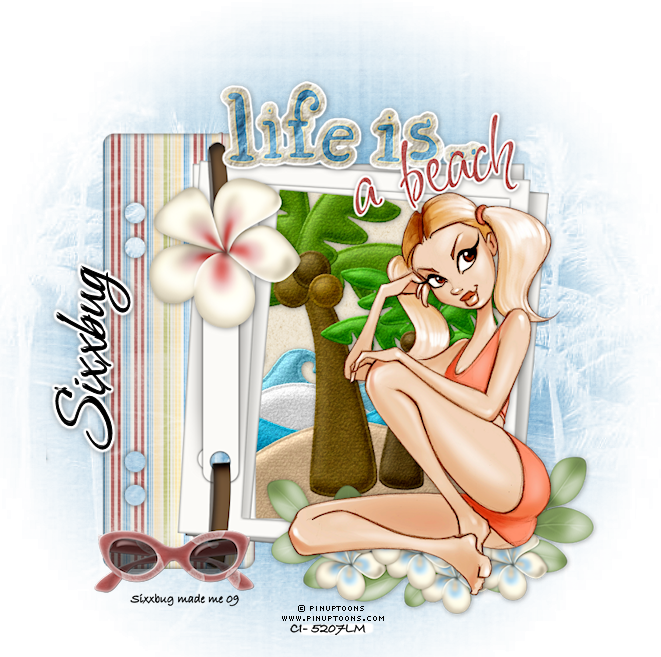
Tube of choice. I used the awesome work of Pinup toons which you MUST have a license to use
You can purchase tubes and a license from CILM~ HERE
Filters: Eye Candy 4000 (Gradient glow, and Glass)
Ok, let's begin!
Open Journal frame 1 from your scrap kit. Image, Canvas size 700x700. We will resize later.
Open paper 5 from kit.
Take your magic wand tool and click inside of your journal frame.
Selections, modify, expand by 2, ok.
Copy and paste paper 5 as new layer.
Copy and paste paper 5 as new layer.
Selections, invert, hit delete on your keyboard
Move your paper layer below your frame layer.
Select your frame layer, and copy and paste your tube, add drop shadow of choice.
Select your paper layer, copy and paste felt palm tree as new layer.
Move it to where it looks good.And take your eraser tool and erase any part of the palm trees that overlap the frame. Add drop shadow of choice
Open your wave layer, and copy and past as new layer so it's behind the palm trees
Again, take your eraser tool and erase any parts overlapping the frame. And add drop shadow of choice
Select your frame layer again
Open flower 2, resize by 75%. Copy and paste at the bottom of your frame so it looks like your tube is sitting on it. Add drop shadow of choice
Open flower 3 and resize by 50%, back on frame layer copy and paste your flower. Again, add the same drop shadow
Open sunglasses and resize by 50% and place to bottom left of the tag
Open your Life is a beach word art, resize by 50% and place to the top of the frame
Effects,Eye candy 4000, gradient glow, Settings, 3, 25,100, Fat. Add drop shadow of choice.
Add new raster layer and send to the bottom, flood fill white. Close it off.
Layers, merge all visible. Resize your image by 80%
Open back up your bottom white layer, Layers, new raster layer, Flood fill this layer with paper 3 from kit
Open your mask, Layers, new mask layer from image, choose your mask from the drop down menu. OK.
Layers, merge group
I went to layers and duplicated my mask layer twice to make it a bit darker
Delete your white layer, and merge visible layers
Add your copyrights, and your name
For my name I used Bonheur Royale Font size 28. And rotated 90 to the left.
Then I applied Eye Candy glass, default settings and gradient glow, same settings you used on your word art.
Then applied a drop shadow of choice. Now you can crop your tag if you want and save as a png. All done!
Hope you enjoyed this tutorial!
This tutorial was written by me on May 13, 2009, and any resemblance to any other tutorial is purely coincidental