Supplies Needed
Yvette's Template 79 which you can download from her blog HERE
WSL Mask 306 which you can download from Weescotslass Creations HERE
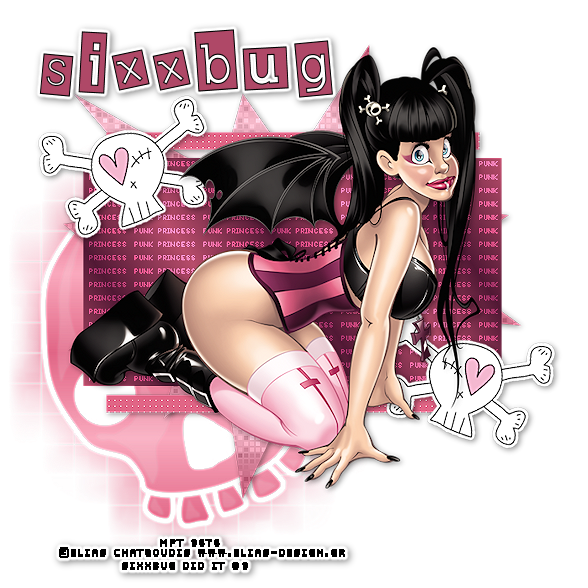
I'm using the awesome work of Elias Chatzoudis
You MUST have a license to use his work. You can get one and purchase his tubes from MPT HERE
Filters Needed
Xero (Frittilery)
Eye Candy 4000 (Gradient Glow)
Penta.com (color dot)
Ok this is a fairly simple one, so Let's get started!
Open your template, and tube of choice.
First copy and past your tube as new layer, making sure it's the top layer. Resize a bit if you feel you need to.
Select Large rectangle layer
Selections, select all, float, defloat, Layers, new raster layer
Make a gradient out of 2 colors to match your tube. Settings ~ Linear, Angle 0, Repeats 2.
Flood fill your layer. Selections none. Delete original layer.
Select your text layer, and change blend mode to overlay
Select your shape layer, Selections, select all, float, defloat, layers, new raster layer
Again make a gradient out of 2 lighter colors to match your tube, same setttings
Flood fill selection. Select none, delete original
Still on that layer, go to Effects, Xero, Fritillary, Settings~ 7, 18, 28, 32, Ok.
Add drop shadow, Settings~ 2, 2, 45. 10.26, ok.
Select small rectangles. Selections, select all, float, defloat, Layers, new raster layer
Flood fill with color of choice. Select none. Delete original layer
Effects, Penta.com, color dot. Settings~ 90, 7, 255, 255, 255, Ok
go back to effects and repeat.
Add same drop shadow as above.
Select skull layer. Effects, Eye candy 4000, Gradient glow, settings~ fat, 3.00, 25, 100, Ok
Add drop shadow.
Select background layer, and add new raster layer
Flood fill this layer with another gradient of choice, same settings as above
Open your mask, Layers, New mask layer from image, and find your mask from drop down menu, ok.
Merge group.
Now resize your mask a bit, to wear you think it looks good, and move down to the lower left hand side of tag, see mine for reference.
Add drop shadow to your tube layer.
Delete your white background.
Merge all visible. And resize tag to the size of your liking
Add your copyrights and you name
I used Earwigfactory font, size 30, and added gradient glow and a drop shadow.
Save as a PNG image.
All done!
I hope you enjoyed this tutorial and found it easy to follow!
This tutorial was written by me on July14 ,2009
And any similarity to any other tutorial is purely coincidental.