This tutorial was written with PSP X2, but any version should work
Supplies Needed
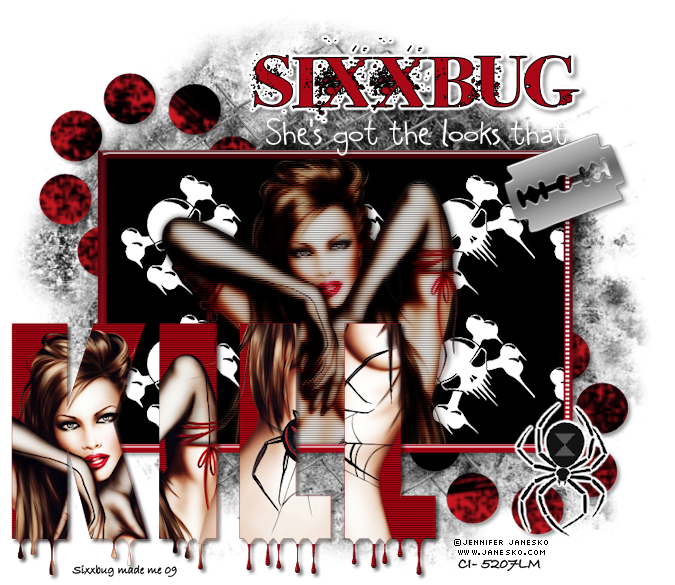
Looks that kill template by Sapphire of Sapphire's splendor which you can download on her blog HERE
Chic Rocker scrap kit by Sammygrrl's Designz which you can download on her blog HERE
Tube of choice
Tube of choice
I'm using the beautiful work of Jennifer Janesko, which you MUST have a lisence to use.
You can get one and purchase her tubes from CILM HERE
Mask of choice
Filters Needed
Eye Candy 4000 ( Gradient glow, and drip)
Vanderlee Unplugged X (Interlace)
Ok Let's get started
Open your template, and your tag of choice.
Click on the Kill layer, and move towards the bottom
Select your rectangle layer and click in it with your magic wand tool.
Copy and past your tube of choice, selections, invert, hit delete. Select none.
Ok, Select your rectangle layer again. Open paper 6 from kit, copy and paste as new layer. Selections, invert, delete, select none.Delete your original rectangle layer.
On your bottom tube layer, Adjust, blur, gaussian blur set to 3.00
On your top tube layer change blend mode to soft light.
Merge the 2 tube layers together and add drop shadow of choice.
Now go to Effects, unplugged, interlace, and apply with default settings, ok.
Ok, now select your rectangle frame layer.
Selections, select all, float, defloat, Layers, new raster layer, and flood fill with a color to match your tube
Delete original frame layer.
Still on frame layer, go to Effects, Eye candy 400, glass, and under setting select Ruby, ok.
Add drop shadow of choice.
Select Kill layer. Selections, select all, float, defloat, Layers, new raster layer
Flood fill with a dark red. Selectons none.
Delete original Kill layer
Effects, Eye candy 4000, drip, default settings ok.
Effects, Unplugged, interlace, default seettings, ok. Add drop shadow of choice.
Select your spider web layer, Image, negative, ok
Click on your spider layer. Effecs, Eye Candy 4000, gradient glow, fat, be sure to change your glow width to 3, ok.
Select "she got the looks" layer, Image, negative, ok, add drop shadow of choice
Select circles layer, Selections, select all, float, defloat, copy and past paper 10 from kit as new layer
Selections, invert, delete. Delete original circles layer.
Select your background layer. Layers, new raster layer, flood fill with paper 9 from kit.
Open your mask, Layers, new mask layer from image, and find your mask in the drop down menu, ok
Merge group. Delete background layer.
Select your group layer, copy and past wire fence from kit, resize by 80%.
Ok select your Kill layer again. Selection, select all, float, defloat. copy and past your tube again, and arrange so part of it shows in the first part of the lettering, invert, delete.
Now paste the tube again, so that another part shows in the rest of the lettering, hit delete again. Select none.
Ok, if you want to resize your tag, do it now. I made sure resize all layers was checked and resized by 90%
Merge visible.
Open razor from kit, resize by 30%, image, free rotate, rotate to the left by 20. Copy and paste under your she's got the looks word art, and add drop shadow.
Add your copyrights, and your name.
I used Inked God font, and added gradient glow, and drop shadow to mine
All done!
This tutorial was writting by me on May 23,2009
And any similarity to any other tutorial is purely coincidental.