Supplies Needed:
Darker side of red PTU scrap kit by Justine You can find a link of where to buy on her blog HERE
UF Mask 43 which you can find HERE
And tube of choice.
I'm using the rocking work of Keith Garvey!
You MUST have a license to use his work. You can get one and purchase his work at MPT HERE
Filters Needed:
Alien Skin Xenoflex 2 (burnt edges, and also constellation, if you intend to animate)
Eye candy 4000 (gradient glow)
Ok so let's get started!
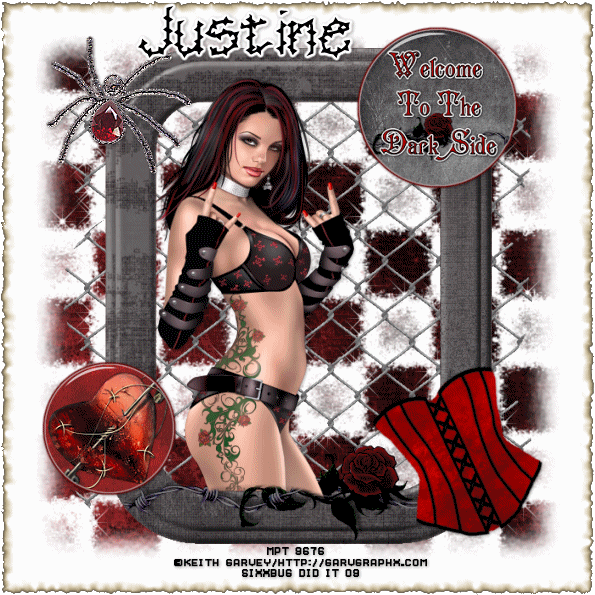
Open frame 1 from kit.
Open up your tube.
Copy and paste your tube as new layer , move under frame.
Layers, duplicate your tube layer, and bring duplicated layer to the top.
Now take your eraser tool and carefully erase any part of tube overlapping the frame.
Add drop shadow to top tube layer.
Go to very bottom layer, flood fill white
Open paper 5 can copy and paste as new layer over white layer
Open mask. Layer, New mask layer from image, find your mask from the drop down menu and apply
Layers, merge group.
Open wire fence from kit and copy and paste over the mask layer.
Add drop shadow.
Open "Welcome to the dark side button" from kit. Resize by 50% and copy and paste to right hand corner of frame.
Effects, Eye candy 4000, gradient glow. Settings: Whte, fat, 3.00,25,100
click on color, and select second white box on the sliding scale and change it to a dark red.
Add gradient glow to the button, and then drop shadow of choice
Open heart button, resize by 40%, place to the lower left hand side of frame and apply same gradient glow and drop shadow.
Open one of the corsets from the kit, resize by 40%, Image, rotate, free rotate, 25 Left.
Place right hand side of frame by rose, add drop shadow.
Open gem spider from kit, and copy and paste in the upper left corner of frame. Add drop shadow
Go to Image, resize, making sure that all layers is checked. And resize entire tag by 85%
Adjust, Sharpen once.
Ok, now select bottom layer, the white one
Effects, Alien Skin Xenoflex 2, Burnt edges, apply default settings
Ok at this point, add your copyrights, and your name.(
I used Barbedwire font for the name, and added gradient glow, white, and drop shadow to mine.
If you don't want to animate, STOP now.
Save your tube as a PNG and your done!
Now If you DO want to animate, continue :)
--------------------------------------------------------------------------------------
TO ANIMATE CONTINUE
Ok, now select your merged group mask layer.
Effects, Alien Skin Xenoflex 2 (constellation)
Settings: Star size 7.31, Size variation 25, Edge star density 19, Overall star density 0
Overdrive 100, Twinkle amount 75, Twinkle rotation 45
Make sure Keep original image is checked.
Ok apply.
Now Edit, copy merged, and paste into animation shop.
Back in PSP, Edit, undo constellation, go back to constellation, and repeat, only hit random seed.
Again, edit, copy merged, and paste into animation, After currant frame.
Now go back and repeat this a third time.
You should then have 3 frames in animation shop
Check your animation to make sure it's working. Save as a gif file and that's it, your done!!!
Hope you enjoyed this tutorial and found it easy to follow!
This tutorial was written by me on August 4 ,2009
And any similarity to any other tutorial is purely coincidental.