Supplies Needed
Template 74 by Melissa at Melissaz Creationz which you can get from her blog HERE
WSL Mask 302 Which you can download from Weescotslass creations HERE
Word art, also from Weescotslass which you can find under word art on the above site
FTU Rock me Scrap kit from Seachell's Scrapz Which you can download from her blog HERE
Tube of choice
I'm using work by Paul John Ballard, which you MUST have a license to use.
You can get one, and purchase his work from CILM HERE
Filters Needed
Eye Candy 4000 (Gradient glow, Glass, Drip, and Fire)
Cybia Screen works ( Light gauze, and Dot screen)
This Tutorial was written using PSP X2 and Animation shop.
Ok Let's get started!
Open your template, Image canvas size 700x700, we will resize later.
Flood fill bottom layer with white.
Select Bottom Circle layer and move layer to the top.
Open element 32 from kit, the pentagram and copy and past as new layer
Arrange over your circle.
Select your circle layer again. with your magic wand tool click inside
Copy and paste your tube of choice and arrange to your liking. Layers, duplicate.
Select your bottom tube layer, Selections, invert, hit delete. Select none.
On your top tube layer, take your eraser tool and carefully erase any part of the tube overlapping the bottom part of the circle.
Layers, merge down, so that you now have 1 tube layer
Add drop shadow of choice. And move your tube layer to the top layer.
Select your circle layer again. Selections, select all, float, defloat, Layers, new raster layer
Make a gradient fill out of 2 colors that match your tube, Settings, Linear, Angle and repeats set to 0. Ok,
flood fill your circle selections none Delete original circle layer.
Effects, Cybia screen works, dot screen, default settings, ok.
Select raster layer 1, Selections, select all, float, defloat, Layers, new raster layer, and flood fill with the same gradient, ok,
select none, delete original layer
Effects, Cybia screen works, Light gauze, default settings, ok.
Next select your other square layer, Selections, select all, float, defloat, Layers, new raster layer, and flood fill with another color to match your tube. Delete original layer.
Effects, Eye candy 4000, Glass, Settings ruby, everything else default, ok.
Ok still on that square layer, go back to Effects, Eye Candy 4000, Drip, settings~ Width 7.20,Maximum length 40.32, Spacing 16.56, Taper 50, Dribble 20. Ok.
Ok, now select the dotted line layer, Selections, select all, float, defloat.
0pen a new blank canvas, flood fill with a color of choice and copy and paste as new layer. Selections, invert, delete.
Open up your word art.And copy and paste as new layer, arange to bottom left of tag
Effects, Eye candy 4000, glass, use same settings as before, ok.
Effects, Eye candy 4000 Gradient glow, Settngs, Fat, White, 3,25,100. Add drop shadow
Ok now add new raster layer and place just above your bottom white layer
Open paper paper 1 from your kit and flood fill new layer with it.
Open your mask, Layers, new mask layer, from image, and choose your mask from the drop down menu. ok.
Layers, merge group.
Ok now you can resize your tag to the size you want. Image, resize, and make sure all layers is checked.
Add your copyrights and signature.
I used Blazed font.
Ok, now we are ready to for the animation!
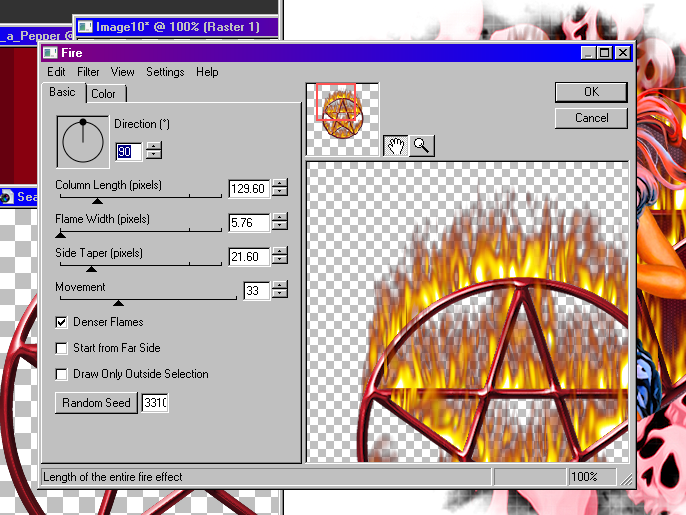
Select your pentagram layer, Effects, Eye candy 4000, fire, with the following settings
Copy merged, and paste into animation shop.
Back to PSP, Edit, undo fire
Back to effects, fire, random seed, ok.
Copy merged and paste after current frame in animation shop
Back in psp, undo fire, and repeat one more time, random seed.
Again copy merged and paste after currrent frame.
View your animation to make sure that it's working correctly and save as a gif file.
All done!
Hope you enjoyed this tutorial!
This tutorial was written by me on June 12 ,2009
And any similarity to any other tutorial is purely coincidental.